
Your number without borders
Download the SLYNUMBER app, choose your U.S. mobile number, and start using it instantly from anywhere in the world.
Follow our step-by-step guide to easily install and activate your new eSIM—no hassle, just quick setup.


Before starting the installation using a QR code, please note the following:
1. Have the QR code ready on another screen so you can easily scan it with your phone’s camera.
2. Ensure you have a stable internet connection throughout the installation process.
Go to your mobile phone settings and then to “When you scan the QR code on your iPhone, the installation process will start automatically.
Click on Continue.
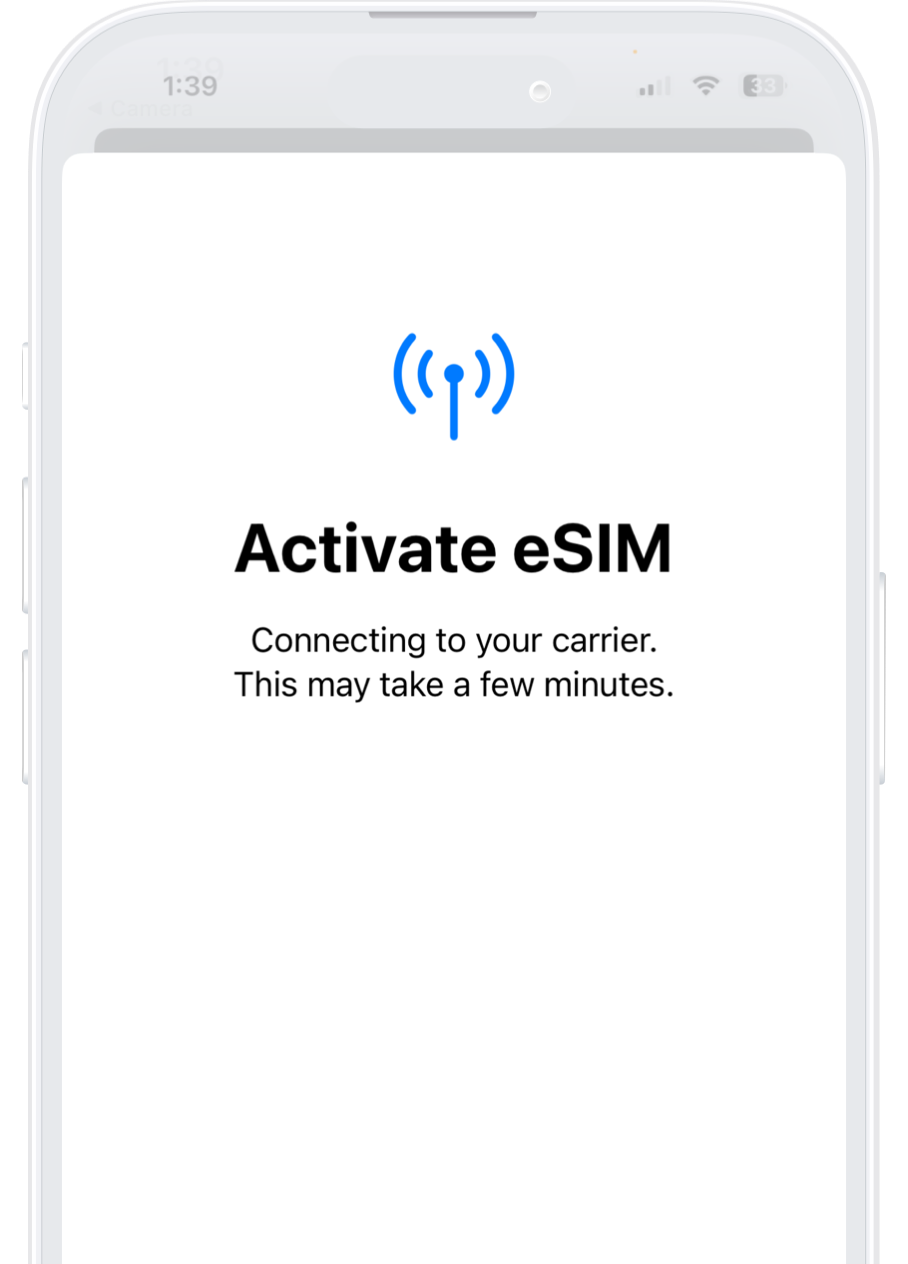
Your plan has now been installed.
Click on Done.
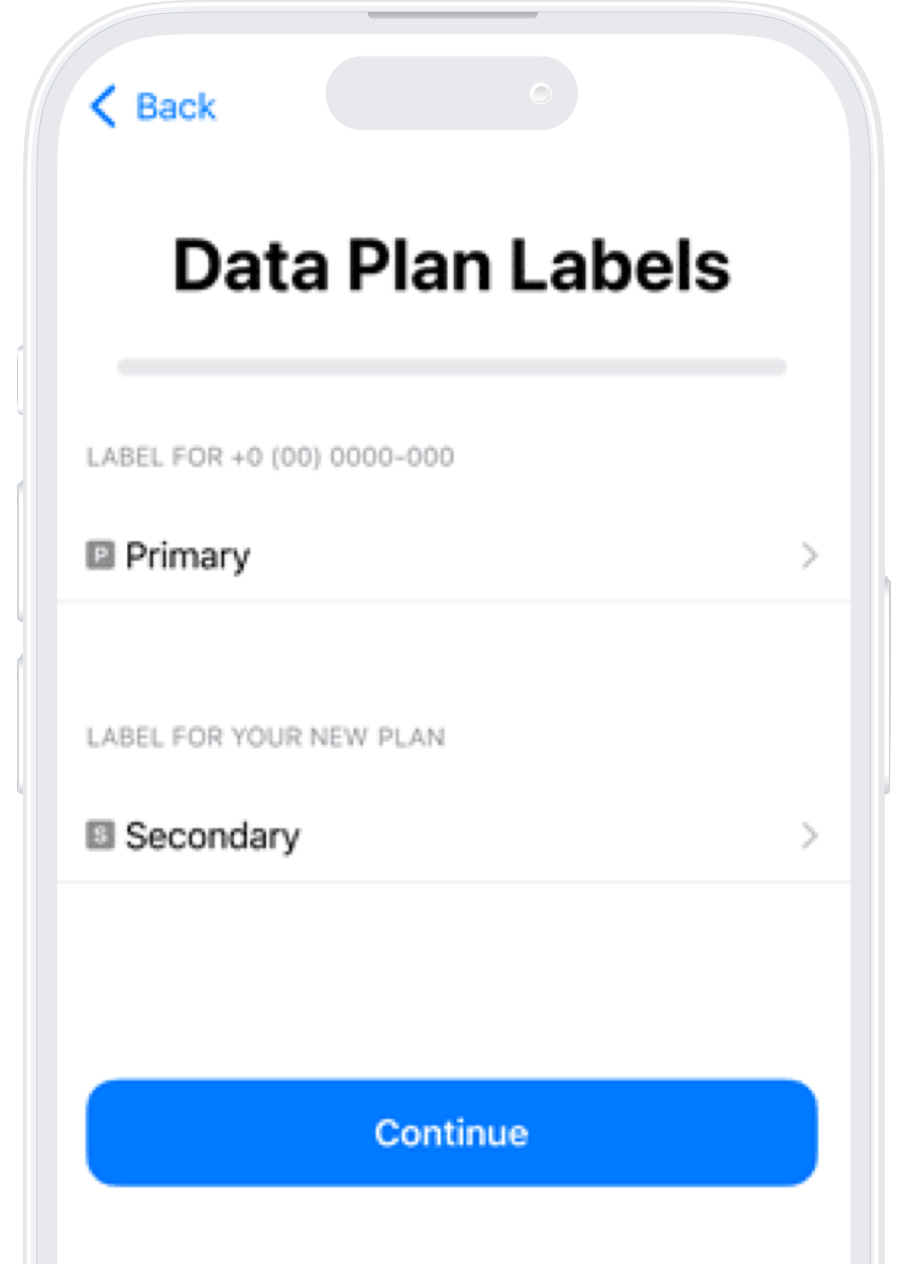
Give your new SLYNUMBER line a name to easily identify it. For example: “SLYNUMBER ”, or if you prefer leave it as "Secondary".
Click on Continue.
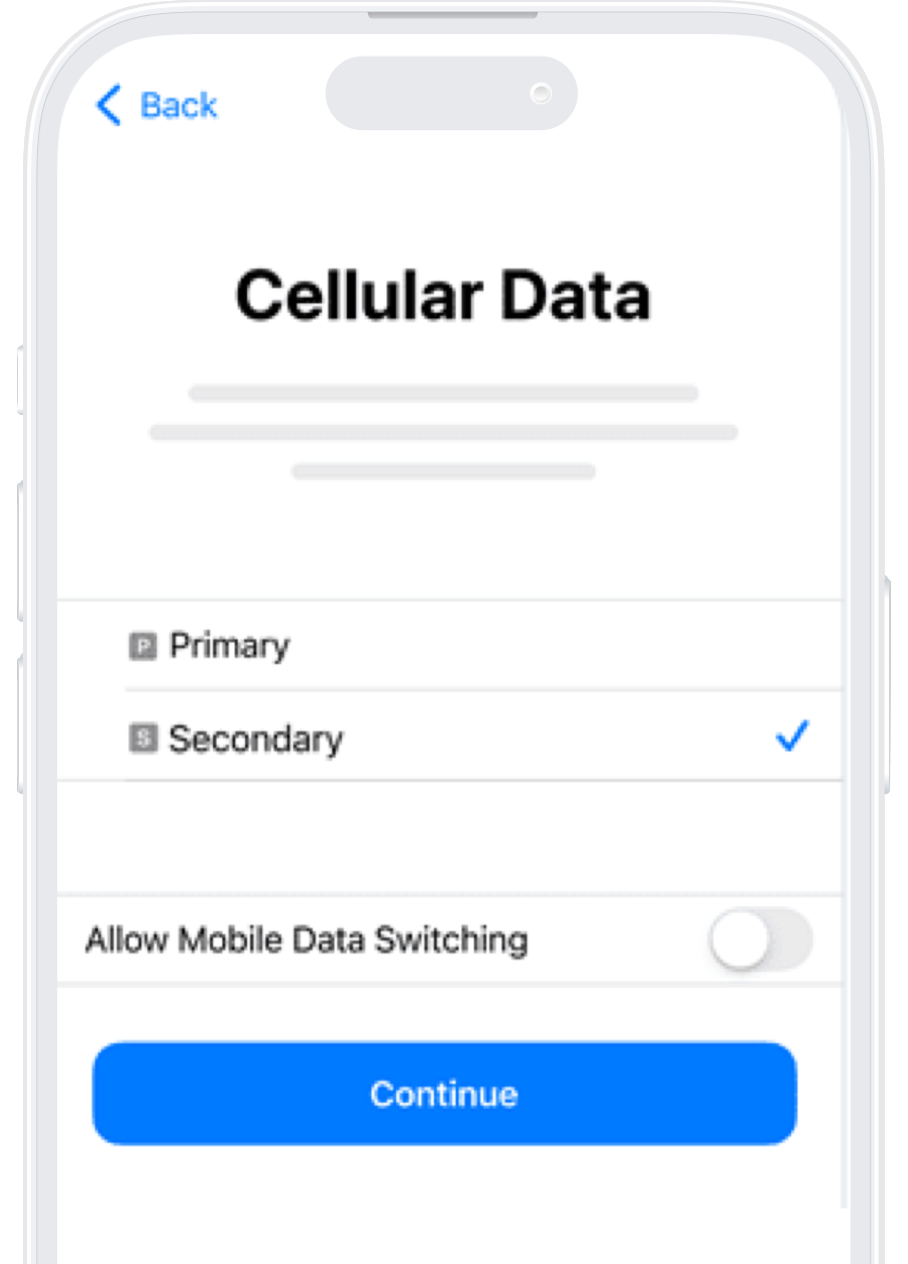
Select the “SLYNUMBER” option.
Keep “Allow Mobile Data Switching” turned off to avoid additional roaming charges.
Click on Continue.
1. Open “Settings” on your iPhone and click “Cellular”.
2. Select your Slynumber plan from the list.
3. Scroll until you find “Roaming” and activate it.
4. Go back to the SLYNUMBER app.
5. Go to the "Cellular Data" tab and click "Active".
Before starting the manual installation, please note the following:
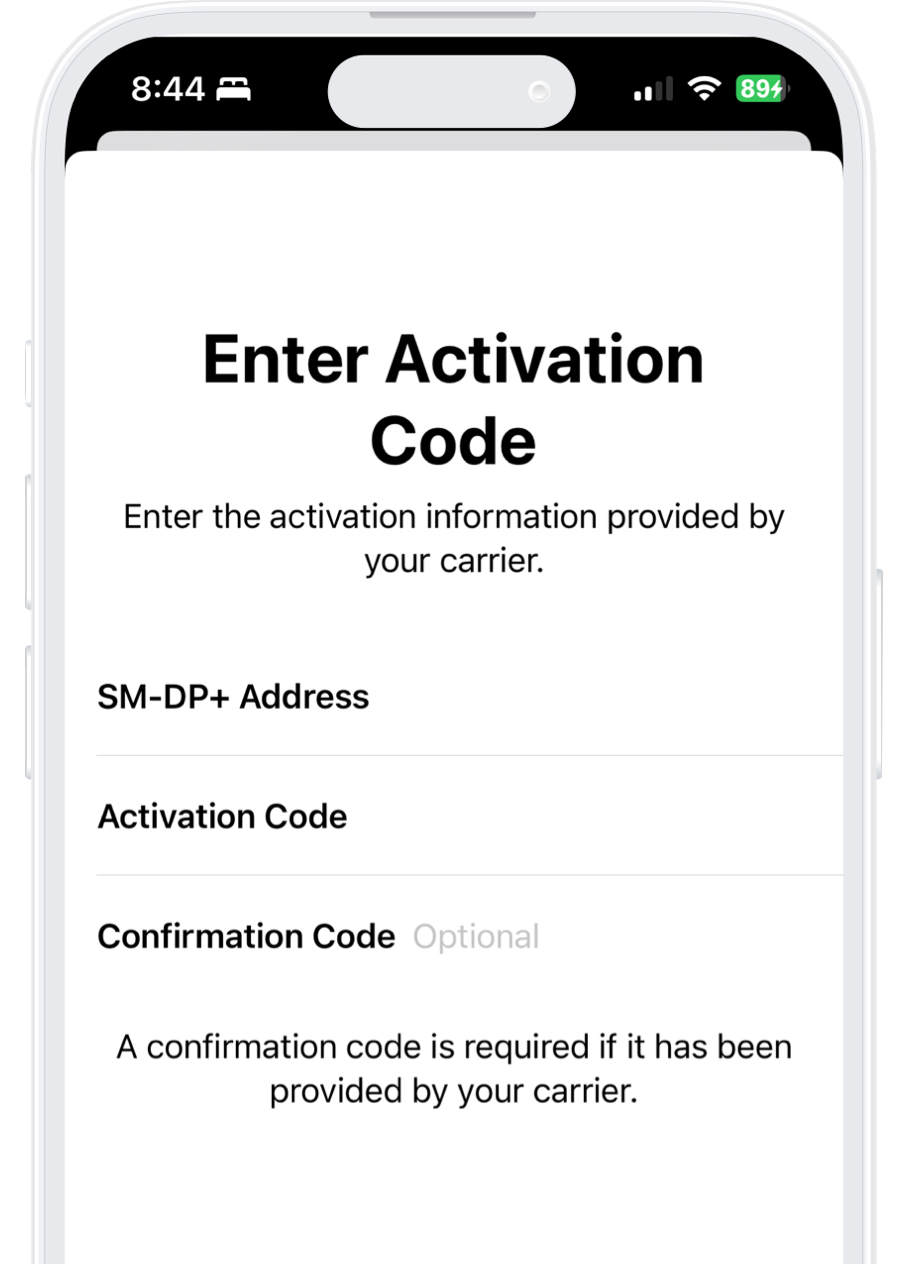
1. Make sure you have both the “SM-DP + address” code and the “Activation Code” and have them on hand to start the installation. You can find these within our app or in the email we sent to you.
2. Ensure you have a stable internet connection throughout the installation process.
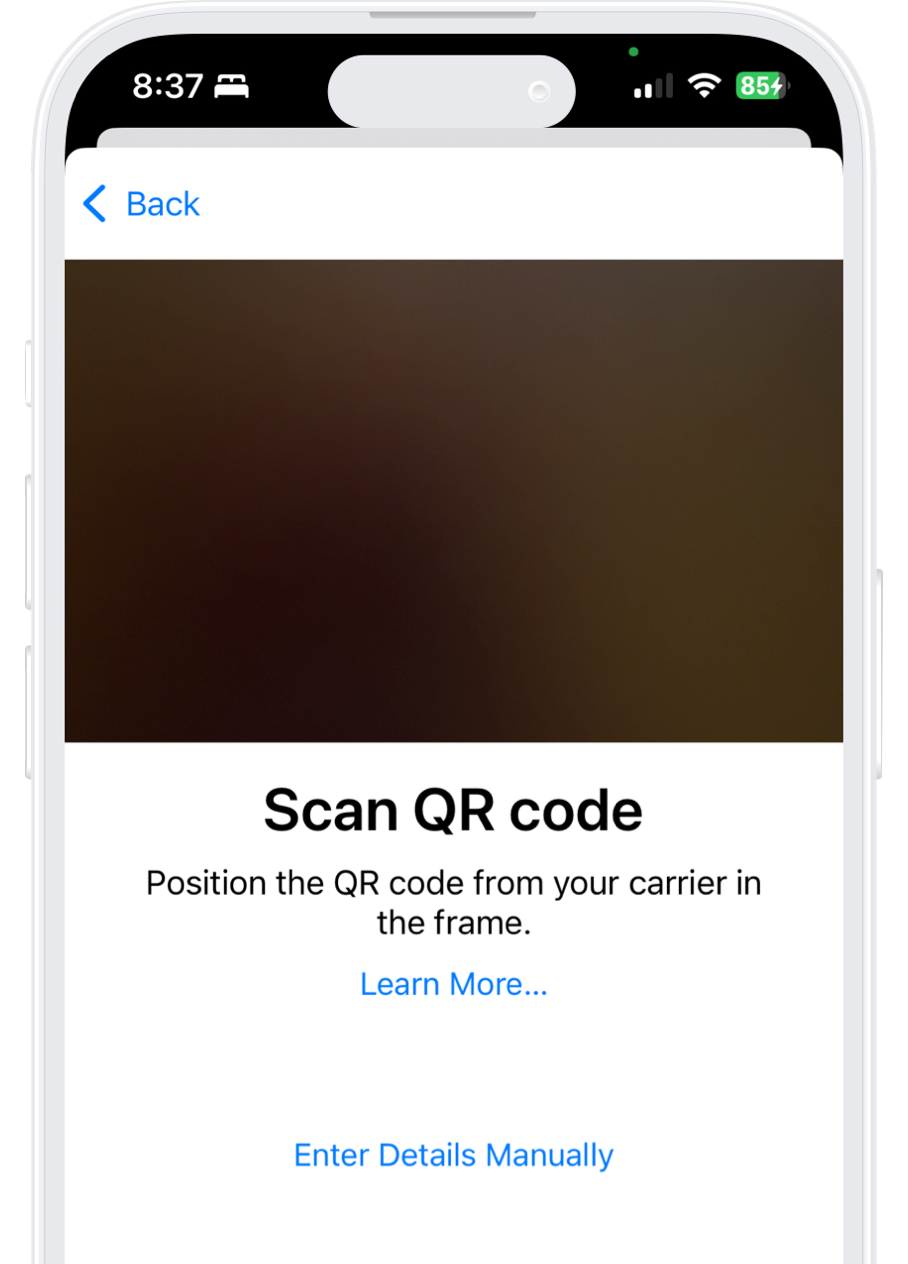
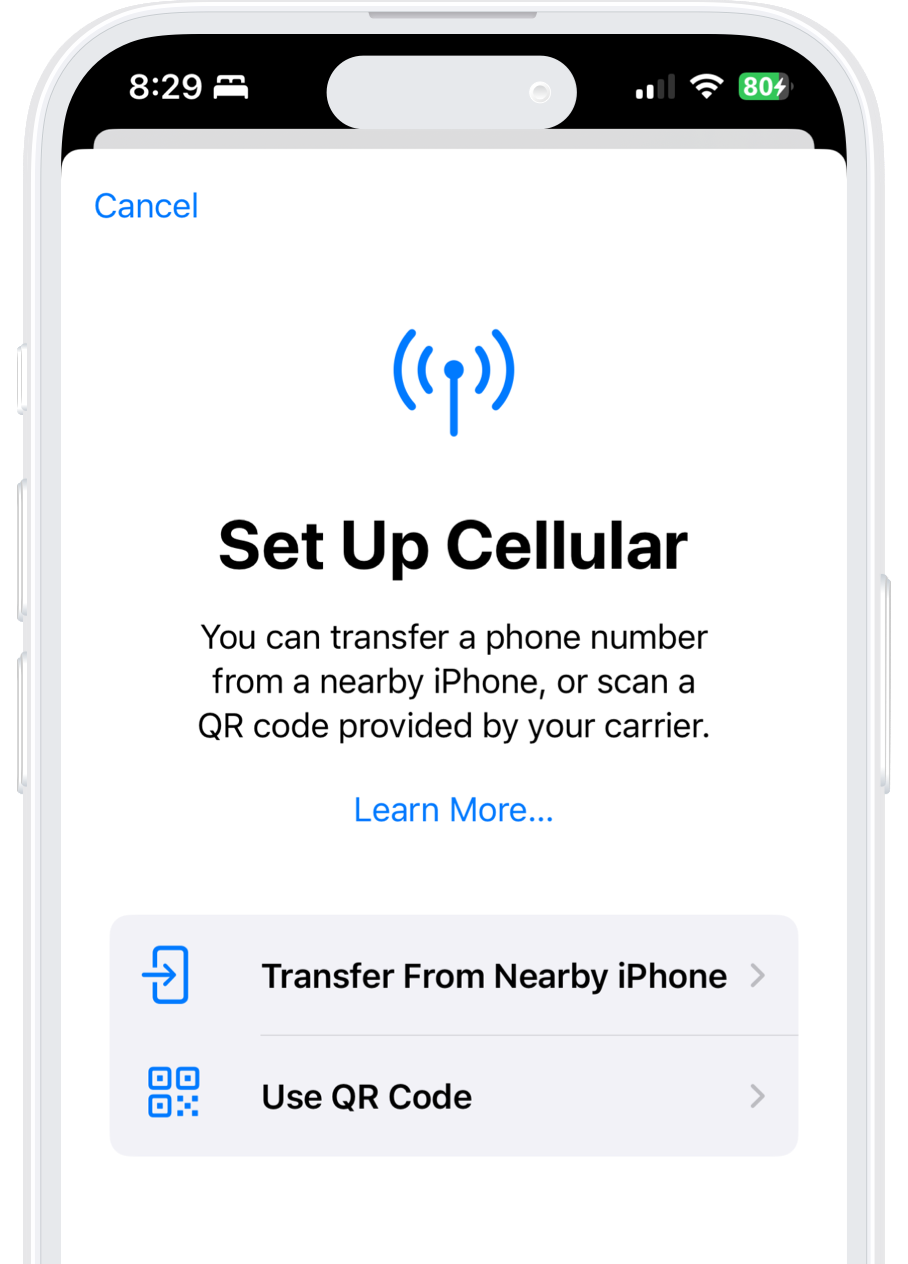
Open "Settings" on your iPhone and then select “Cellular”, scroll down, and click on “Add eSIM” and select “Use QR Code”.
Click on Continue.
Once there, scroll down.
Finally, click on “Enter Details Manually”

Now it’s time to copy and paste the SM-DP + address and Activation Code into the corresponding field.
Your iPhone will show you your new data plan.
Press “Continue” and wait for your plan to be installed (this can take a few minutes).
Give your new SLYNUMBER line a name to easily identify it. For example: “Slynumber ”, or if you prefer leave it as "Secondary".
Click on Continue.
Select the “Secondary” option.
Keep “Allow Mobile Data Switching” turned off to avoid additional roaming charges.
Click on Continue.
1. Open “Settings” on your iPhone and click “Cellular”.
2. Select your Slynumber plan from the list.
3. Scroll until you find “Roaming” and activate it.
4. Go back to the SLYNUMBER app.
5. Go to the "Cellular Data" tab and click "Active".
We understand this process can be confusing, please feel free too reach out to us if you have any questions or need further assistance!
Download the SLYNUMBER app, choose your U.S. mobile number, and start using it instantly from anywhere in the world.