
The only second mobile number app
Available on the iOS App Store and Google Play Store
Follow our step-by-step guide to easily install and activate your new eSIM—no hassle, just quick setup.


Before starting the installation using a QR code, please note the following:
1. Have the QR code ready on another screen so you can easily scan it with your phone’s camera.
2. Ensure you have a stable internet connection throughout the installation process.
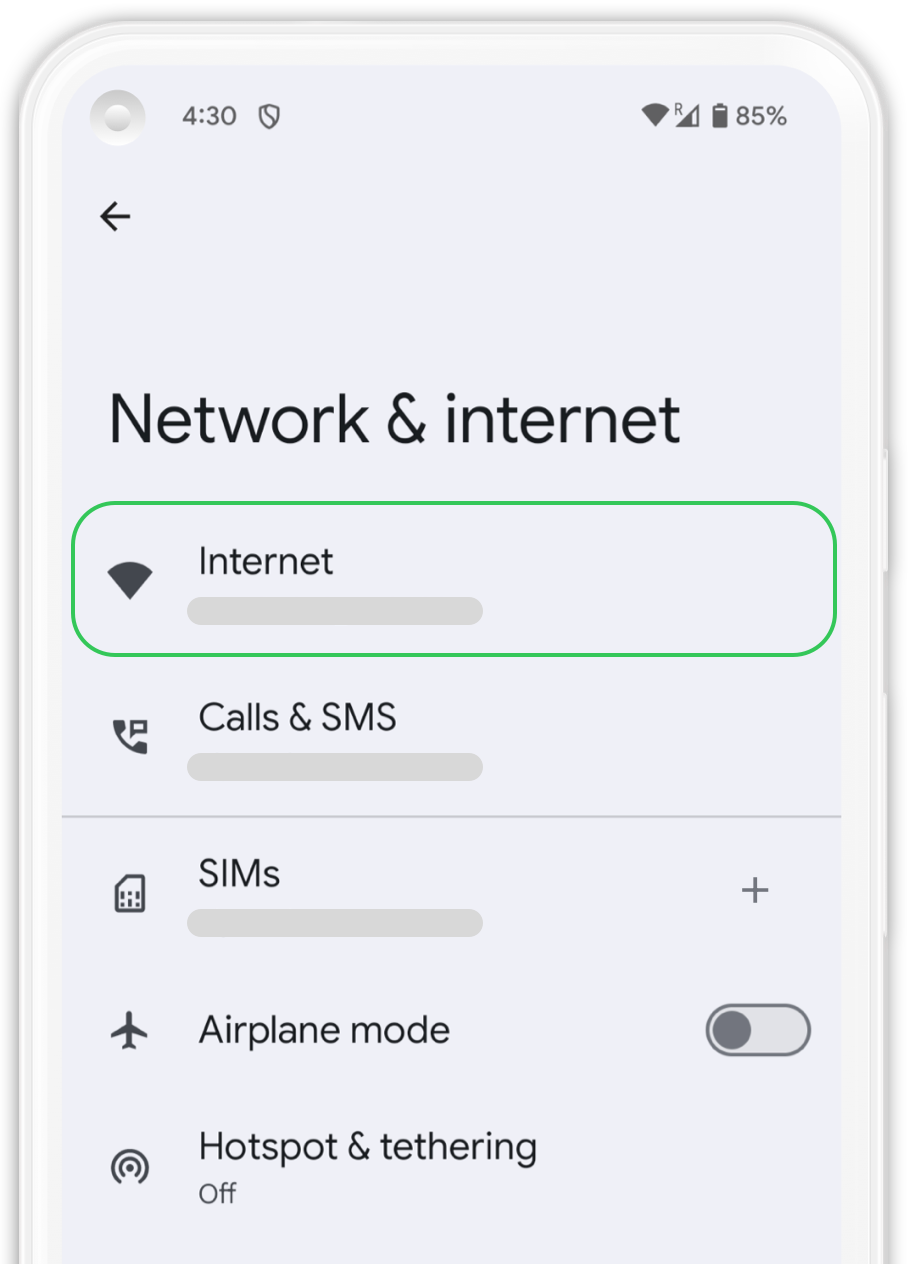
Go to your mobile phone settings and then to “Network & Internet”. Verify that you have a stable internet connection (Wi-Fi or mobile data).
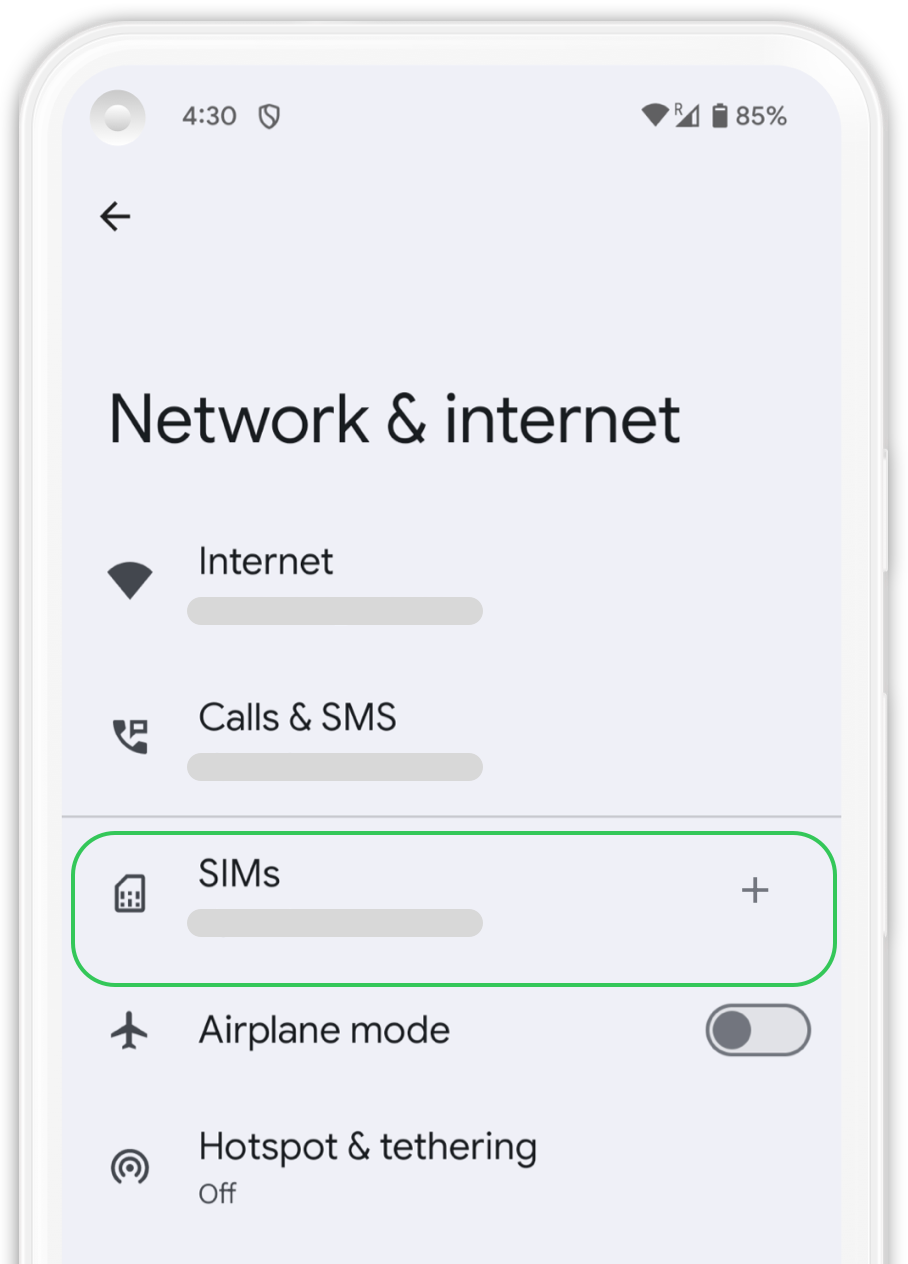
In “Network & Internet”, click on the “SIMs” tab to add your new eSIM.
In "SIMs" tab press “Add SIM” a message will pop up saying “Checking network info...”, wait a few seconds and continue the process.

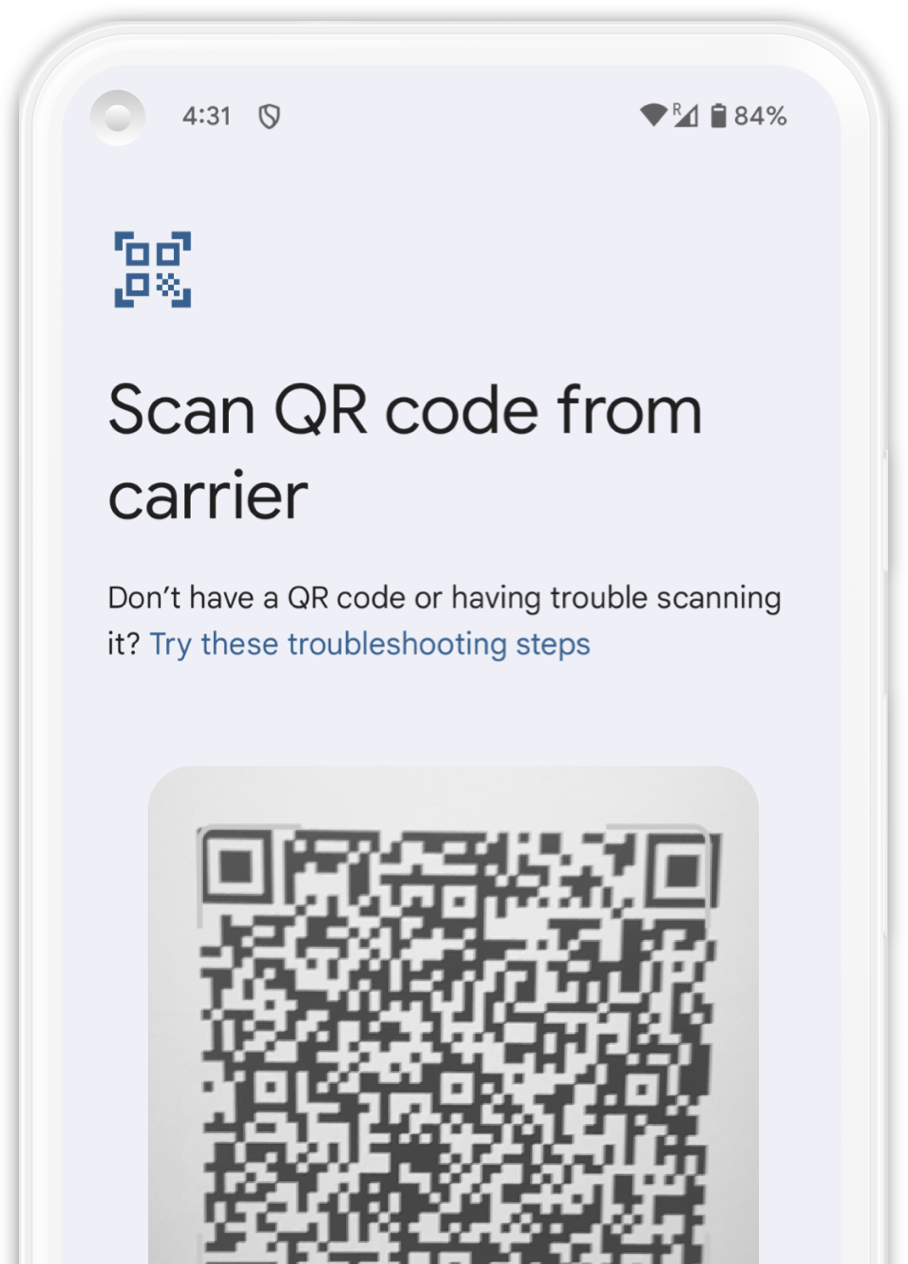
Scan the QR code we provided to you by pointing the box shown on the screen over the QR code. Wait a few seconds until the plan is identified. Press “Download” to add it to your device.
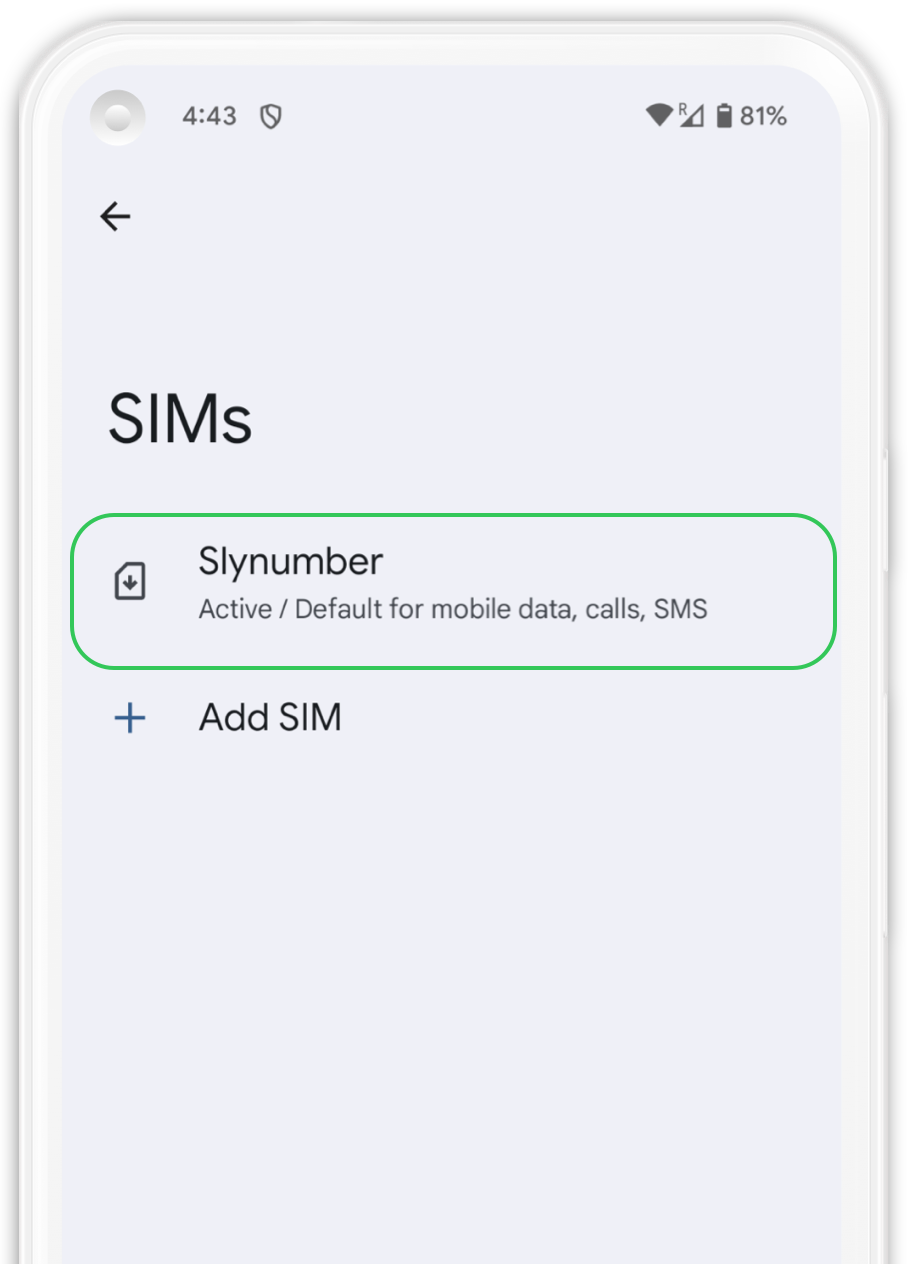
Your eSIM that is associated with SLYNUMBER is now installed. We recommend labeling your new eSIM, simply click on your new plan and select the edit icon in the top right corner and naming it "Slynumber".
1. Open “Settings” and then go to “Network & Internet”.
2. Select your Slynumber plan from the list.
3. Activate your new plan by clicking on the “Use SIM” option.
4. Select your Slynumber data plan from the options that appear on the screen.
5.Scroll until you find “Roaming” and activate it. Make sure to deactivate your main line to avoid surcharges.
Before starting the manual installation, please note the following:
1. Make sure you have the Android activation code we provided when you made the eSIM purchase.
2. Ensure you have a stable internet connection throughout the installation process.
Go to your mobile phone settings and then to “Network & Internet”. Verify that you have a stable internet connection (Wi-Fi or mobile data).
In “Network & Internet”, click on the “SIMs” tab to add your new eSIM.
In "SIMs" tab press “Add SIM” a message will pop up saying “Checking network info...”, wait a few seconds and continue the process.
Click on “Try these troubleshooting steps”, you will find an option in this tab to install your eSIM manually.
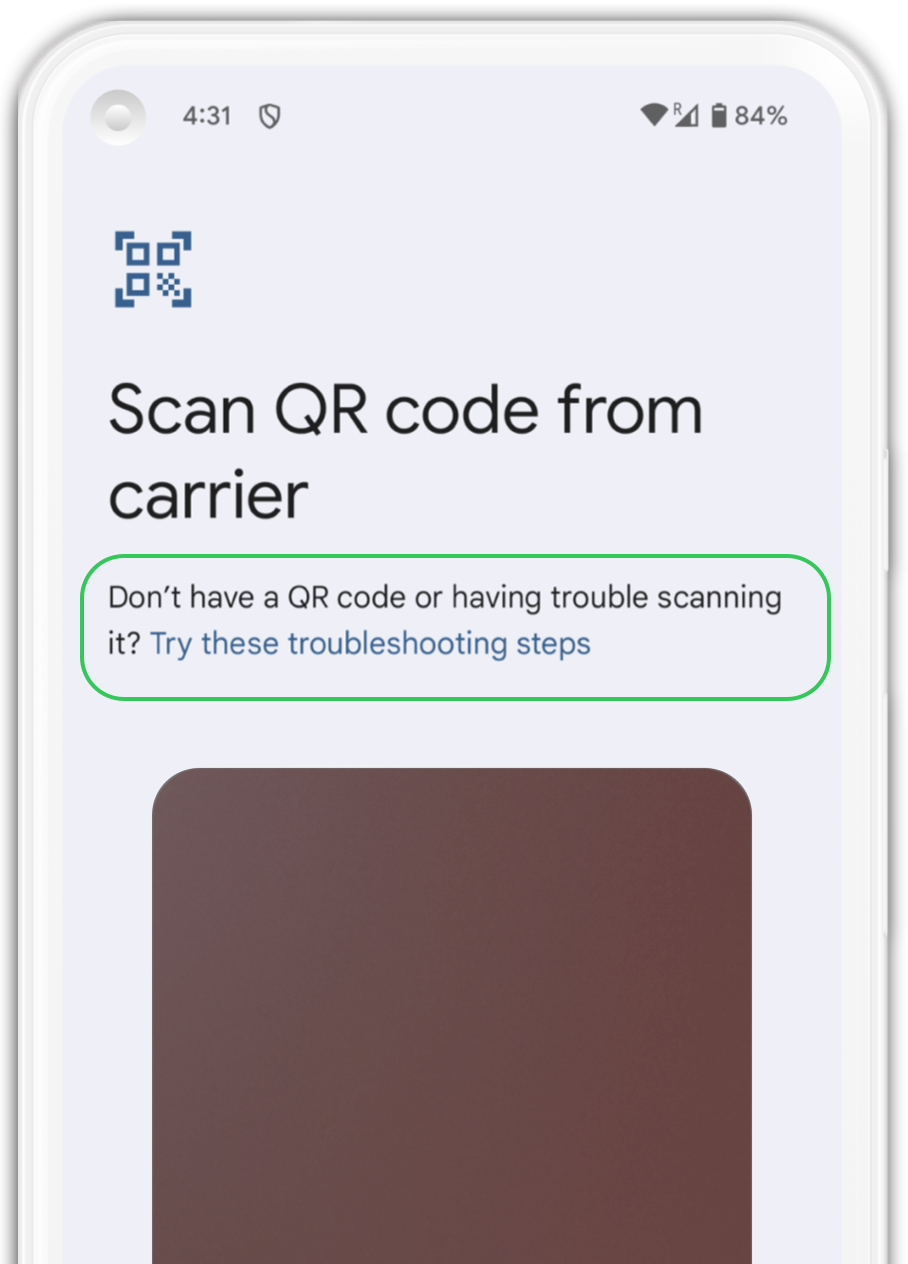
Locate the circled section and click on the “Enter Manually” option.
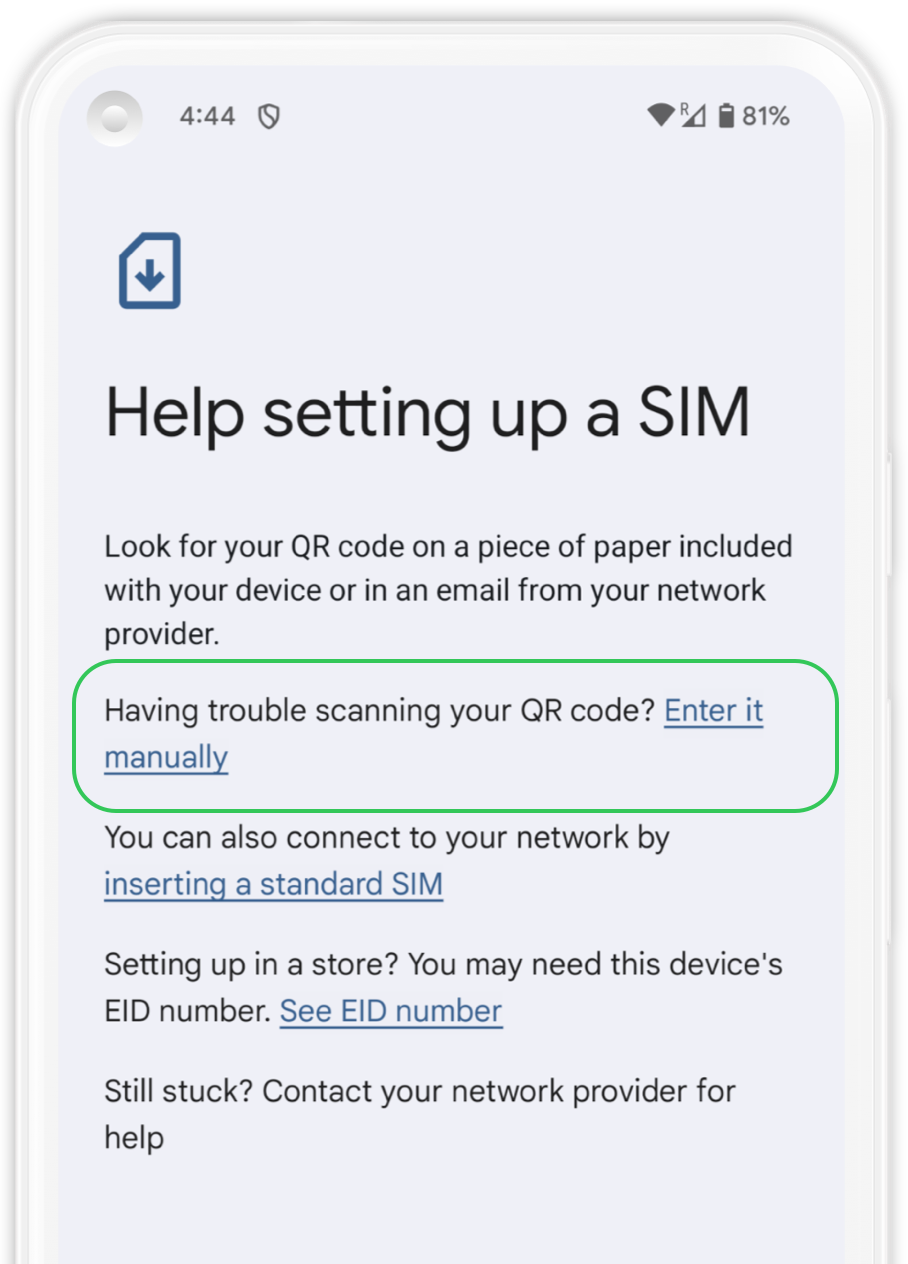
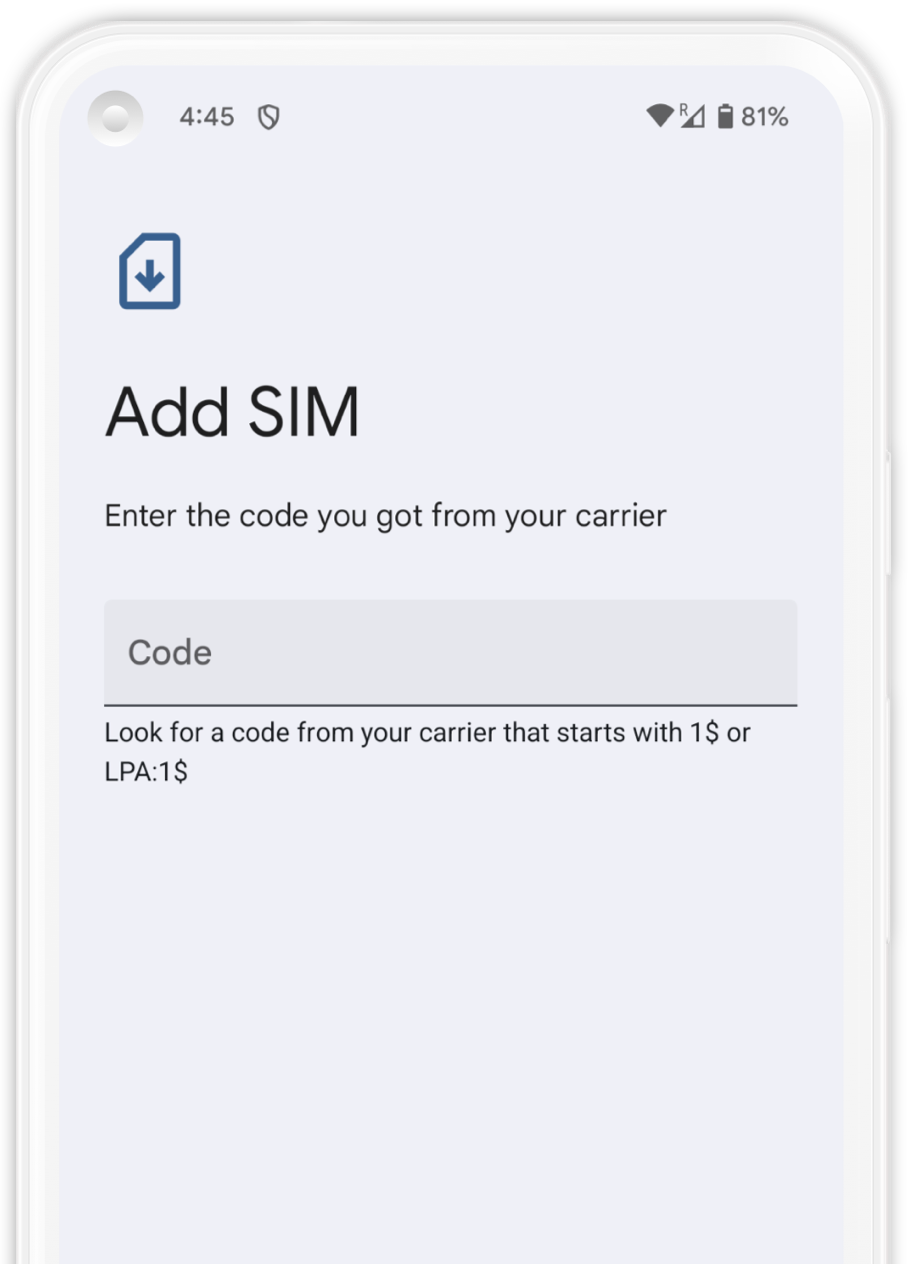
Copy and paste the manual installation code for Android to manually install your eSIM. Press “Continue” and wait a few seconds until the plan is identified. Press “Download” to add it to your device.
Your eSIM that is associated with SLYNUMBER is now installed. We recommend labeling your new eSIM, simply click on your new plan and select the edit icon in the top right corner and naming it "Slynumber".
1. Open “Settings” and then go to “Network & Internet”.
2. Select your Slynumber plan from the list.
3. Activate your new plan by clicking on the “Use SIM” option.
4. Select your Slynumber data plan from the options that appear on the screen.
5.Scroll until you find “Roaming” and activate it. Make sure to deactivate your main line to avoid surcharges.
We understand this process can be confusing, please feel free too reach out to us if you have any questions or need further assistance!
Available on the iOS App Store and Google Play Store